You will learn how to harvest sweet cherry tomatoes from compact pots placed on a patio or small doorstep. Master the watering rhythm and feeding routine required when root space is strictly confined.
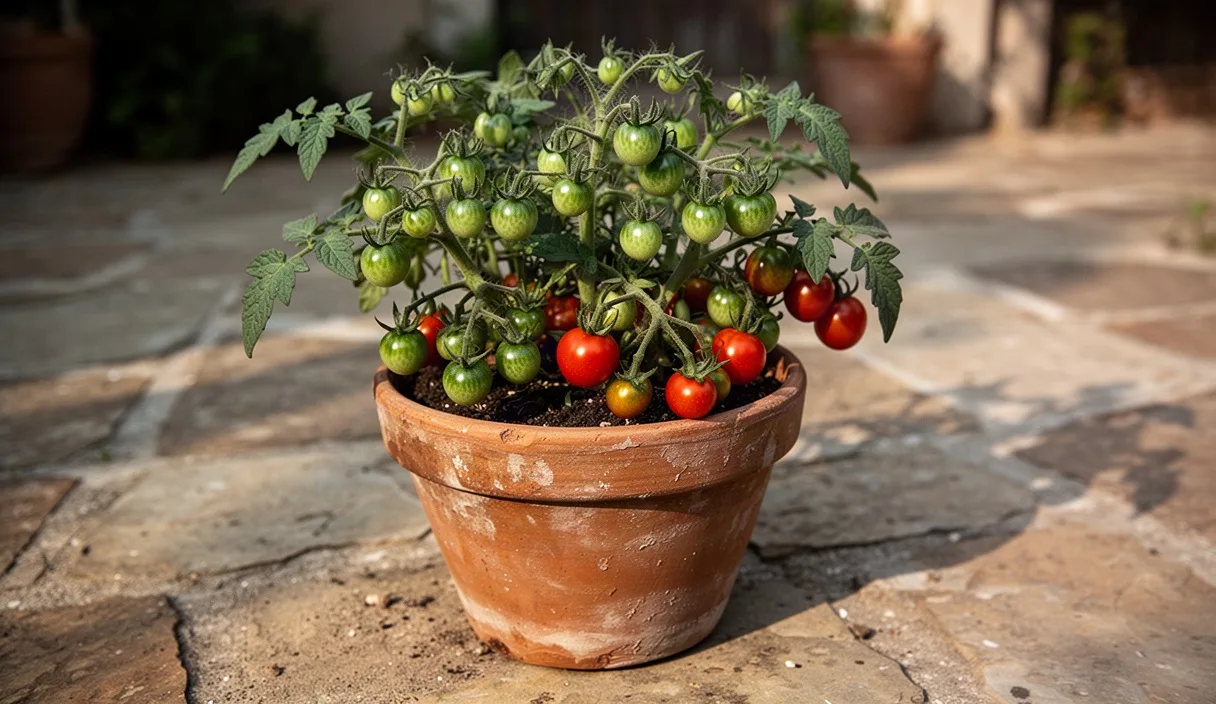

- Pick determinate bush varieties that need no side-shoot pinching or tall staking.
- Check container soil moisture twice daily during warm spells to prevent split fruit skins.
- Feed with high-potash tomato feed once the first yellow flowers set fruit.
A five-litre container sits right on the edge of what a tomato plant can comfortably tolerate. Standard garden advice often demands massive 30-litre tubs or deep raised beds, which is discouraging if your growing space consists of a single balcony ledge, a fire escape landing, or a crowded back patio. Yet with the right plant genetics and attentive daily care, five litres of compost provide ample space to produce a heavy yield of sweet cherry tomatoes before the season turns cold.
The restriction of a modest pot changes your role from casual observer to active life-support system. In a small volume of soil, nutrients wash through quickly, roots hit plastic walls within weeks, and moisture evaporates at a swift pace on breezy July afternoons. Success relies entirely on picking varieties bred to remain compact, building an open potting mix that breathes, and maintaining a steady hand with the watering can.
Selecting dwarf and determinate tomato varieties for pots
Never plant an indeterminate, or vining, tomato in a five-litre container. Varieties like 'Gardener's Delight' or 'Sungold' produce endless vegetative growth, quickly developing a root system that will strangle itself in five litres of compost by midsummer. Instead, look strictly for determinate bush types, dwarf varieties, or micro-dwarfs bred explicitly for small spaces and patio containers.
Determinate tomatoes grow to a genetically predetermined size, set their fruit clusters, and stop expanding. Micro-dwarf varieties rarely exceed 30 to 40 centimetres in height, making their root mass proportionate to a five-litre root zone. Dwarf varieties can reach 60 to 80 centimetres, which requires slightly more vigilance with feeding and watering, but rewards you with substantially larger yields.
| Variety | Growth Habit | Average Plant Height | Fruit Characteristics |
|---|---|---|---|
| Red Robin | Micro-dwarf bush | 25 to 35 cm | Sweet, mild cherry; very prolific in tight spaces |
| Vilma | Dwarf determinate | 40 to 50 cm | Firm, bright red cherry with traditional acidity |
| Maskotka | Sprawling bush | 35 to 45 cm | Thin-skinned, highly aromatic early fruit; trails nicely |
| Tumbling Tom | Trailing pendulous | 20 to 30 cm spread | Plentiful yellow or red cherry clusters suited to pot edges |
| Tiny Tim | Dwarf determinate | 30 to 45 cm | Sturdy upright stems, tart-sweet small saladettes |
When reviewing seed packets, seek phrases such as "determinate habit," "patio type," or "dwarf foliage." If a packet mentions "requires rigorous sideshoot removal" or "cordon," put it back. You want plants that retain all their side shoots, because every single lateral branch on a bush tomato carries an extra truss of flowers.
Pot drainage requirements and selecting appropriate potting media
Standard topsoil or heavy garden loam has no place in a small container. When placed inside plastic walls, dense soil compacts rapidly, driving out microscopic air pockets and creating anaerobic zones around root tips. A five-litre pot requires a loose, sponge-like medium that balances maximum aeration with adequate moisture retention.
Begin by inspecting the container itself. A standard five-litre nursery pot measures roughly 19 to 21 centimetres in diameter across the top rim and stands about 18 centimetres deep. Ensure it contains at least four to six generous drainage holes around the base. If you are using decorative buckets, drill extra holes through the lowest edge rather than just the centre bottom, as perched water tables tend to gather in container corners.
Mix your own potting substrate rather than relying on unamended commercial compost, which often settles into a dense brick after weeks of daily watering. A reliable, well-tested recipe includes:
- High-grade peat or coir base (55 percent): Provides initial water retention and structure without adding weed seeds or pathogen loads.
- Screened composted bark or worm castings (25 percent): Adds organic matter, beneficial microflora, and gentle background nutrition.
- Coarse perlite or horticultural grit (20 percent): Maintains open capillary channels and ensures surplus water flushes straight through the drainage holes.
Resist the enduring myth of placing gravel, broken pottery shards, or stones at the base of the pot. Far from improving drainage, a layer of stones creates a perched water table, forcing the saturated zone higher up into the limited soil volume and robbing the tomato of valuable root space.
Initial potting techniques and light staking for heavy fruit clusters
Transfer seedlings into their final five-litre quarters once they have established four to six true leaves and the risk of late spring frost has completely passed. Unlike many garden vegetables, tomatoes benefit immensely from deep planting. The stem possesses adventitious root cells that awaken when buried beneath cool, damp compost, creating an anchor system that fills out the pot quickly.
Fill the pot until the bottom third is firm. Pinch off the lowest set of seed leaves (cotyledons) and any yellowing lower foliage. Place the root ball directly into the centre, allowing the lower stem to sit below the container rim. Fill in with your potting blend until the compost surface rests roughly 2.5 centimetres beneath the pot rim. This empty head space is vital; without it, liquid feed will simply spill over the sides during summer top-ups rather than sinking down to the core.
Bush tomatoes do not need tall canes or complex string trellises, but do not make the mistake of leaving them entirely unsupported. While the main stem is thick and stout, a single healthy micro-dwarf can bear 40 to 60 cherry tomatoes simultaneously. When rain soaks a plant laden with ripening fruit, the lateral branches often sag outward and fracture at the main union.
- Insert three 45-centimetre bamboo canes in an equilateral triangle around the interior rim of the pot immediately after planting, taking care to avoid slicing the central root ball.
- Wrap soft garden twine or strips of cotton fabric horizontally around the canes at a height of 15 centimetres and again at 30 centimetres.
- Allow the growing branches to rest naturally upon the horizontal twine as they expand outward.
- Loop loose ties around particularly heavy individual fruit trusses, anchoring them back to the vertical canes without pinching the vascular sap channels.
Managing moisture consistency in small soil volumes
Water management makes or breaks container culture. In an open vegetable bed, roots can travel downward into subsoil reserves when the surface dries out. In a five-litre pot, the plant is trapped. On a sunny day with temperatures near 28 degrees Celsius, an actively fruiting dwarf tomato can exhaust available water in less than eight hours.
Check your containers by feel rather than by arbitrary calendars. Lift the pot by its rim: a fully hydrated five-litre container weighs noticeably heavy in the hand, while an exhausted pot feels surprisingly light, resembling dry styrofoam. Alternatively, plunge your index finger into the potting medium down to the second knuckle. If the soil feels cool and grains cling loosely to your skin, hydration is sufficient. If it feels dusty and warm, water immediately.
Water slowly and thoroughly until roughly 10 percent of the applied volume exits the bottom drainage holes. This flushing action guarantees that the entire root column receives moisture, preventing dry hydrophobic pockets from forming deep in the root ball. Empty saucers twenty minutes after watering; never allow a tomato pot to stand perpetually in stagnant run-off, which suffocates delicate feeder roots.
During the height of summer, apply a 2-centimetre surface mulch of clean straw, chopped miscanthus grass, or fine bark chips over the compost. Mulching shields the potting soil from direct sunlight, reducing evaporation rates and keeping the upper root zone comfortably cool during heat spikes.
Applying liquid potash feeds at the flowering stage
A restricted soil volume holds a finite pool of nutrients. Most pre-fertilised commercial composts run out of readily available food within four to five weeks. Relying solely on water after this point produces pale, spindly growth and small, flavourless fruit. However, the timing and nutritional profile of your fertilizer applications must change as the plant shifts from vegetative growth to fruit production.
During the early leafy stage, tomatoes require balanced nitrogen to build stems and foliage. But the moment the first bright yellow flower trusses split open, nitrogen must take a back seat. Excess nitrogen at this juncture triggers dense, jungle-like leaf growth at the expense of floral development, and softens the cell walls of the plant, making it a target for aphid colonies.
Switch immediately to a high-potassium (potash) liquid fertilizer, such as a certified organic seaweed and comfrey blend or a standard tomato fertilizer formulation. Potassium directs sugars to swelling fruit, thickens cell structures, and encourages continuous blossom formation. Aim for a nitrogen to potassium ratio roughly around 1:2 or 1:3.
- Concentration: Dilute the liquid feed according to the manufacturer instructions, or slightly weaker. A weak solution applied frequently is vastly safer than a concentrated dose applied rarely.
- Cadence: Apply the potash solution once every seven days during early flowering. Once green fruit covers the branches, increase feeding to twice per week.
- Delivery: Always saturate the potting soil with plain water before applying liquid feed. Applying concentrated mineral salts to bone-dry compost pulls moisture outward from dry root hairs through reverse osmosis, causing acute chemical root scorch.
Preventing blossom end rot through even watering habits
Blossom end rot appears as a flat, dark, leathery patch on the bottom end of the tomato fruit, opposite the stem. It ruins crops rapidly and generates immense frustration among container gardeners. While the condition is a direct symptom of calcium deficiency in developing fruit tissue, the true underlying culprit is almost never a lack of calcium in your potting soil.
Tomatoes transport calcium upward purely through the transpiration stream, dissolved in water drawn up by the roots and pulled toward actively transpiring leaves. Calcium is an immobile element within the plant: once deposited in a leaf, it cannot be relocated to a developing fruit. If a small container dries out completely, water movement stops. Even if the drought lasts only four hours, the expanding fruit cells are starved of calcium during that window. Their cell walls collapse, creating the sunken black lesion that later emerges as the fruit ripens.
Adding eggshells, chalk, or garden lime to your five-litre pot will not fix the issue if moisture swings persist. Instead, adopt these cultural practices to keep the internal transpiration stream flowing smoothly:
- Water at the same hour each morning so the plant enters the heat of midday fully hydrated.
- Provide light shade during extreme afternoon heat waves to prevent leaves from transpiring water faster than roots can absorb it.
- Avoid excessive application of potassium, magnesium, or ammonium fertilizers, as high concentrations of these positive ions actively compete with calcium ions for uptake at the root surface.
- Strip away badly damaged fruit as soon as you spot them. The plant will not repair collapsed tissue, and clearing them redirects resources toward intact higher trusses.
Common mistakes
Container gardening invites a few recurring missteps that can quickly derail a season. Being mindful of these small errors makes the difference between an abundant harvest and a struggling plant:
- Over-pruning bush varieties: Removing the lateral branches (sideshoots) from a determinate tomato destroys its yield. Unlike cordon varieties, bush tomatoes bear their harvest on these exact side stems. Put the pruning snips away.
- Relying on decorative outer pots without drainage: Dropping a plastic pot inside a solid ceramic glazed planter looks tidy, but hidden irrigation water pools at the base, rotting the root system out of sight.
- Erratic watering schedules: Soaking a dry pot on Sunday, forgetting it until Wednesday, and drowning it on Thursday will cause fruit skins to split open within an afternoon due to rapid internal water pressure shifts.
- Choosing pots that are too small: Three-litre pots are occasionally sold for herbs, but bush tomatoes in three litres require watering three times a day by August. Five litres represents the practical lower limit for a reliable harvest.
Getting started with your container crop
A thriving crop of patio tomatoes does not require expansive beds or complicated hardware. To get your compact season rolling, source seeds of a proven micro-dwarf such as 'Red Robin' or 'Vilma' from a reputable merchant, or pick up stocky, dark green seedlings from a local greenhouse in late spring. Prepare your pots by scrubbing them clean with warm water and mixing an open substrate loaded with coarse perlite to protect aeration.
Position your containers in an outdoor spot that receives between six and eight hours of direct sunlight each day, shielded from fierce prevailing winds. Keep your watering can close at hand, monitor moisture daily by pot weight, and switch to your liquid potash feed the instant the first yellow blossoms emerge. With a little routine consistency, you will harvest bowls of ripe, concentrated cherry tomatoes right outside your back door.
This publication provides general horticultural advice for home gardeners; consult a professional agronomist or arborist for commercial crops or structural tree safety. Disclaimer