You can cut back primocane raspberry canes with confidence each late winter to guarantee a heavy crop from August onwards. Learn the exact pruning height and how to mulch the row to protect shallow root networks.
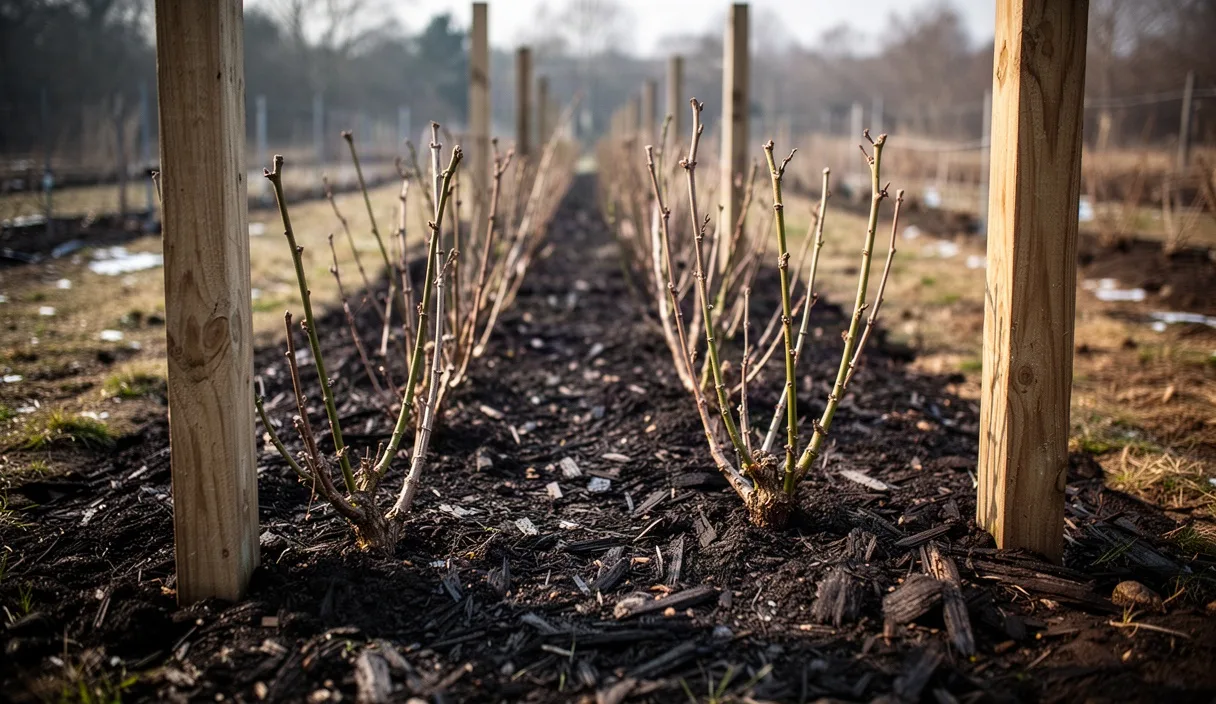

- Cut all canes flat to ground level in late winter before new shoots emerge.
- Remove cut canes from the plot to eliminate overwintering cane blight spores.
- Apply a generous layer of compost along the row without smothering emergent buds.
Autumn-fruiting raspberries are among the most generous soft fruits you can plant in a garden bed or deep patio trough. Unlike their midsummer cousins, which require a careful selection of old wood versus new shoots, autumn varieties carry their fruit on fresh growth produced during the current season. This unique biological habit turns annual maintenance into one of the simplest tasks on the fruit grower's calendar, provided you know exactly which canes to cut and when to pick up the tools.
When you prune these plants down completely during the cold months, you reset the row for vigorous spring shoots that will carry berries from late August until the hard frosts of October. Leaving canes to manage themselves, on the other hand, produces a congested thicket of tangled brambles, smaller berries, and poor air movement that invites fungal rot. Taking an hour with a pair of sharp bypass secateurs in the dead of winter sets the foundation for a heavy harvest with very little daily fuss later in the year.
Identifying primocane raspberries versus summer floricane varieties
Before making a single cut, you need to confirm that your raspberries are true autumn-fruiting varieties. Raspberries fall into two distinct botanical categories: primocanes and floricanes. Primocane varieties, such as 'Autumn Bliss', 'Polka', 'Joan J', and 'All Gold', develop new green canes in spring, produce flowers near the cane tips by midsummer, and ripen their crop from late summer through autumn, all within a single growing season.
Floricane varieties, commonly referred to as summer-fruiting raspberries, operate on a two-year cycle. They produce leafy vegetative canes in their first year, go dormant through the winter, and flower on that woody brown growth the following June and July. If you prune summer floricanes down to the soil during winter, you inadvertently chop away the very wood that would have fed you berries six months later. Knowing what you have in the ground prevents a summer of disappointment.
| Feature | Primocane (Autumn-Fruiting) | Floricane (Summer-Fruiting) |
|---|---|---|
| Crop Timing | Late August to late October or first frost | Mid-June to late July |
| Bearing Wood | New green canes produced that same year | Two-year-old woody canes produced the previous season |
| Common Varieties | Autumn Bliss, Polka, Joan J, Heritage | Glen Ample, Malling Jewel, Tulameen |
| Pruning Style | Cut entirely to the ground in late winter | Selectively thin old spent brown wood after fruiting |
If you inherited a garden and have no idea which variety you are looking at, observe where the dried berry remnants sit in late autumn. If the dried fruit stalks are clusters at the top 30 to 45 centimetres of the tallest, newest canes, you are almost certainly looking at an autumn primocane. If you remain uncertain, leave a few canes intact over winter as an experiment to see where the early summer flowers form, but treat the rest according to the autumn routine.
The ideal timing for winter pruning before spring buds wake
The correct window for pruning autumn raspberries sits squarely between January and late February. In colder northern zones, this window can stretch into early March, as long as the dormant buds on the crown beneath the soil surface have not begun to push green tips into the cold air. Cutting too early, such as immediately after the final berries finish in October or November, robs the plant of valuable reserves.
During the quiet weeks of late autumn, the fading foliage and green stems withdraw carbohydrates, nitrogen, and minerals back into the subterranean root system and crown. This natural transfer supplies the energy required to fire off rapid root establishment in early spring. Allow the foliage to turn completely yellow, brown, and dry before you even think about lifting your shears. The canes will look entirely lifeless, which is precisely what you want.
Equally, you must avoid delaying the cut until the crown breaks dormancy in mid-spring. If you wait until fresh green shoots are already 8 to 10 centimetres high, swinging a pair of secateurs near the ground level will inevitably snap or bruise the delicate emerging stems. Pick a clear, dry winter afternoon when the ground is cold and firm rather than frozen solid or soaked with standing water. Working on waterlogged soil compresses the earth around the crowns and reduces the pore space roots need to thrive.
Cutting canes flush with the ground using sharp secateurs
Pruning primocanes is straightforward because it requires no selective thinning of specific canes. Every single stem that produced fruit, along with any weak, pencil-thin suckers that sprouted late, must be cut cleanly back. Your target is to cut each cane as close to the soil surface as humanly possible, leaving stumps no taller than 1 to 2 centimetres.
Leaving tall, 10-centimetre stubs above the soil line is a frequent shortcut that creates practical headaches later. Those old stubs often produce weak lateral branches that fruit low to the ground where mud splashes onto the berries. Worse, old stubs dry out, crack, and act as entry points for pathogens and pests looking for winter shelter. Cutting flush forces the raspberry plant to send up fresh, high-energy basal shoots straight from the subterranean crown buds, which results in thicker stems capable of holding heavy trusses of fruit.
- Scrape back loose surface leaves or heavy mulch from the base of the cane clump so you can clearly see the soil line.
- Inspect your bypass secateurs to ensure the blades are clean, free of rust, and sharp enough to slice paper without tearing. Anvil-style pruners should be avoided here, as their crushing action bruises the stem base.
- Place the flat cutting blade of the secateurs parallel to the ground surface, holding the tool tight against the root crown without digging deep into the soil.
- Snip cleanly through the cane in a single, decisive motion. If the wood is thick and resistance is high, use short-handled loppers rather than twisting the secateurs, which tears the bark.
- Repeat the process across the entire row, removing every cane until the bed looks like a collection of tiny, flat wooden buttons level with the soil.
Clearing clippings to prevent fungal diseases
Once every cane is on the ground, resist the temptation to run over them with a lawnmower or leave them lying around the base of the canes as informal mulch. Old raspberry wood frequently harbours overwintering spores of raspberry spur blight (Didymella applanata), cane blight (Paraconiothyrium fuckelii), and grey mould (Botrytis cinerea). If left in contact with damp ground, these fungal pathogens release millions of spores as temperatures warm up in April, landing directly on your tender new shoots.
Rake up every cut stem, along with any fallen foliage, dried mummified berries, and broken twigs from the bed. Use a flexible wire spring-tine rake or a short hand-rake to gather the detritus without gouging the crowns below the surface. A clean, bare soil surface around the raspberry stool creates an environment where sunlight can warm the earth directly, waking up the dormant crowns several days earlier than beds choked with sodden plant refuse.
If your canes were healthy throughout the prior summer, showing no signs of purple-black lesions or peeling bark, you can safely chop them up and hot-compost them in an active, well-managed heap. If you noticed dark blotches near the lower leaf nodes or dying cane tips during the previous harvest, place the clippings into the municipal green-waste bin or burn them if local regulations permit. Cleanliness here is far more effective than spraying commercial fungicides later in the season.
Top-dressing the raspberry row with compost and mulch
Because autumn raspberries must construct their entire framework and crop in under six months, they have high nutritional demands. They are shallow-rooting plants that draw moisture and food from the upper 20 to 25 centimetres of soil. Once the beds are clear of old wood and weeds, this dormant period offers the single best window to replenish the soil without disturbing root structures.
Apply a balanced organic fertiliser or pelleted poultry manure along the row, keeping to roughly 70 to 80 grams per linear metre of bed. Scatter this evenly across the soil zone rather than piling it directly on top of the cut crowns. Avoid fast-acting synthetic nitrogen salts at this stage; excessive soluble nitrogen before growth begins simply leaches into the winter groundwater or prompts brittle, sappy green shoots that succumb to late spring frosts.
Immediately after feeding, top-dress the entire strip with a 5 to 7 centimetre layer of well-rotted organic matter. Excellent options include:
- Well-rotted garden compost that has broken down into a crumbly, dark texture
- Aged farmyard manure that is at least a year old and does not smell of raw ammonia
- Composted fine bark or leaf mould for lighter soils prone to drying out
Lay this mulch along the full width of the bed, spreading it roughly 40 centimetres out on either side of the cane line. Take care to lay it lightly over the crowns; do not mound it up like a volcano. This organic blanket keeps moisture locked into the shallow root zone during dry spring spells, suppresses annual weed seeds that compete for food, and slowly feeds the earth as worms integrate it throughout the growing season.
Supporting new canes as they grow during late spring
Garden lore often claims that autumn-fruiting raspberries do not need support because their canes are sturdier and shorter than summer varieties. While it is true that varieties like 'Autumn Bliss' rarely reach the towering 2.5-metre heights of summer floricanes, they will easily grow to 1.5 metres. When that upper canopy becomes laden with heavy clusters of ripening fruit in late September, a passing autumn rainstorm combined with moderate wind can flatten the entire row like dominos.
Setting up your framework in late spring, when the fresh green shoots reach knee-height (about 40 centimetres), keeps maintenance smooth and avoids root disturbance later. A simple post-and-wire arrangement or a temporary parallel-string system works best for autumn raspberries, offering support without the need to meticulously tie in individual stems.
Building a double-wire corridor
Drive stout timber posts (at least 75 millimetres in diameter) into the soil at each end of the row, sinking them 45 centimetres into the ground to ensure they can resist wind loads. Screw a horizontal wooden cross-arm measuring 60 centimetres in length to each post at a height of 90 centimetres from the ground. Fasten a second cross-arm 40 centimetres higher up if your variety tends to grow vigorously.
Stretch heavy gauge galvanised wire or rot-resistant poly cord between the cross-arms on either side of the row, creating a wide channel through which the new canes grow. As the new canes surge upward through May and June, they simply lean against the parallel wires. If the corridor spans more than 3 metres, add intermediate stakes to stop the wires sagging inwards under the collective weight of the harvest.
Thinning congested shoots
As the new canes fill that corridor in late spring, take ten minutes to evaluate the density of your stand. Even with ideal pruning, a vigorous root crown often throws up far more shoots than it can reasonably sustain with water and sunlight. Aim for an optimal density of roughly 10 to 12 strong, straight canes per linear metre of bed.
Reach into the row with your secateurs and snip out any spindly, crooked, or crowded canes that are falling behind the main pack. Thinning out the weak runners allows sunlight to penetrate the central base of the row, drastically reduces the microclimate conditions that favor botrytis rot, and ensures the plant directs its resources toward producing larger, sweeter berries rather than masses of useless foliage.
Common mistakes
Even seasoned gardeners run into predictable traps with primocane raspberries. Steer clear of these four missteps to keep your crop consistent:
- Pruning half-way down: Trimming the tops off autumn canes in winter instead of cutting them flush will trigger summer berries on the lower wood, but it will dramatically reduce your autumn crop and exhaust the plant. Unless you are intentionally managing a double-cropping system, always cut all the way to the soil.
- Leaving high, jagged stubs: Stems cut 15 centimetres above ground level encourage high branching that snaps under wind strain. Make flat, clean cuts at the soil line.
- Pruning while frost is in the wood: Cutting canes when temperatures are below freezing causes the frozen timber to shatter and split downward into the crown rather than severing cleanly. Wait for an afternoon above 4 degrees Celsius.
- Over-fertilising with high-nitrogen chemical feeds: Applying aggressive chemical lawn fertilisers or excessive nitrogen prompts lush, leafy canes that stretch upward at the expense of floral buds. Stick to slow-release compost and well-rotted manure.
Practical next steps
To put this guide into practice, take a walk out to your raspberry patch this week with a notepad and assess the site before bringing out the tools.
First, check the cane wood for dormancy. If the leaves have withered and dropped, clear away any fallen branches or debris tangled around the bases so the crowns are clearly visible. Next, check your secateurs: sharpen the cutting edge with a fine whetstone and wipe the metal with rubbing alcohol to remove any residual sap or fungal spores from previous garden jobs.
Mark a dry afternoon in January or February on your calendar to make the cuts flush to the earth. Once the stems are gathered and removed, secure your bags of garden compost or aged manure so you can lay down your feeding layer immediately after pruning. A single morning of methodical work during the quietest period of the gardening year ensures your autumn raspberry row will wake up primed for a plentiful harvest.
This publication provides general horticultural advice for home gardeners; consult a professional agronomist or arborist for commercial crops or structural tree safety. Disclaimer